
Winnie Hornet Restoration
Page 1 of 6 • 1, 2, 3, 4, 5, 6 ![]()

Winnie Hornet Restoration
![]() robinkritz1 Sat Feb 06, 2010 10:44 pm
robinkritz1 Sat Feb 06, 2010 10:44 pm
As I had promised, I have moved the Winnie epic to this section as now its a project. Winnie was delivered today and I managed to have a more detailed butchers. I now have a clear picture of what will be required to have her up and running. The first step is to get her road worthy and sort out the more serious rust areas. I dont want to do a temporary fix on the outside bodywork so that when its all complete I wont have to worry about it again, just prep it ready for paintwork.I will do a temporary fix to the floor area in fibre glass, then when Ive saved enough I will have both front floor sections replaced, the back floor is very good on both sides, there are just small areas undeneath the back seat that will need repairing it will not require much work. I think I will have to change the front pannel I looked underneath and it does not look healthy there are some metal sections that give rigidity to the valance, one side may require replacing but seeing that Im replacing the whole front I might as well do both sides. I will post detailed pics of all the areas and if anyone has some advice on how to tackle these areas with ease I will be very greatfull. This is Winne being dropped off.
[img]
 [/img]
[img]
 [/img][img]
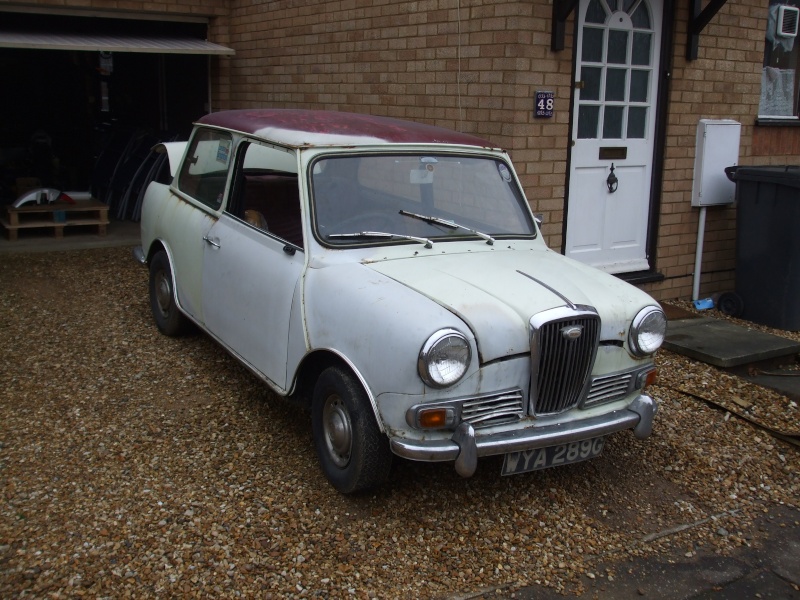 [/img][img]
 [/img]
What will be her new home very soon.
[img]
 [/img]
These are the close up pics of the problem areas
[img]
 [/img][img]
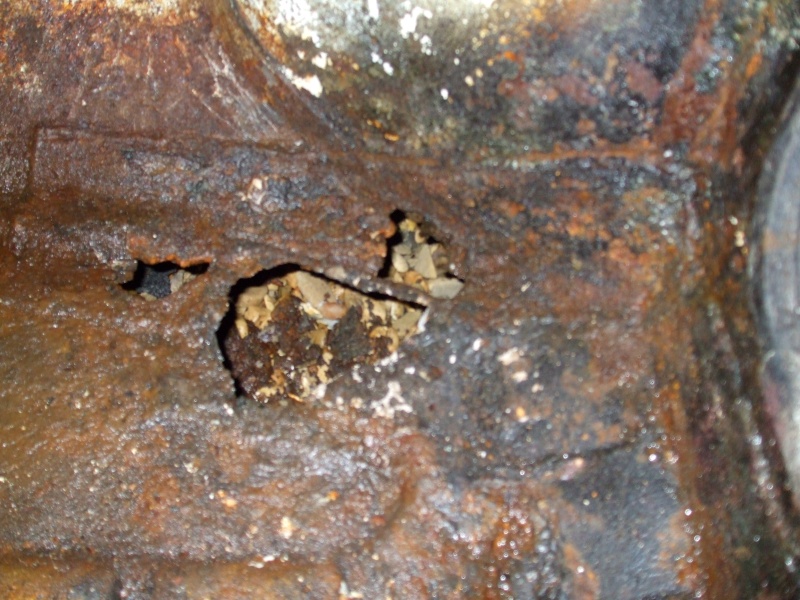 [/img][img]
 [/img][img][url=https://servimg.com/view/14794265/32
Last edited by robinkritz1 on Sun Feb 07, 2010 12:35 am; edited 2 times in total

robinkritz1- Posts : 124
Points : 5353
Join date : 2010-01-09
Re: Winnie Hornet Restoration
![]() robinkritz1 Sun Feb 07, 2010 12:30 am
robinkritz1 Sun Feb 07, 2010 12:30 am
[img]
 [/img][img]
 [/img][img]
 [/img][img]
 [/img][img]
 [/img][img]
 [/img][img]
 [/img][img]
 [/img][img]
 [/img][img]
 [/img]
robinkritz1- Posts : 124
Points : 5353
Join date : 2010-01-09
Re: Winnie Hornet Restoration
![]() robinkritz1 Sun Feb 07, 2010 1:16 am
robinkritz1 Sun Feb 07, 2010 1:16 am
 [/img][img]
 [/img][img]
 [/img][img]
 [/img][img]
 [/img][img]
 [/img]
robinkritz1- Posts : 124
Points : 5353
Join date : 2010-01-09
Re: Winnie Hornet Restoration
![]() robinkritz1 Sun Feb 07, 2010 1:38 am
robinkritz1 Sun Feb 07, 2010 1:38 am
 [/img][img]
 [/img][img]
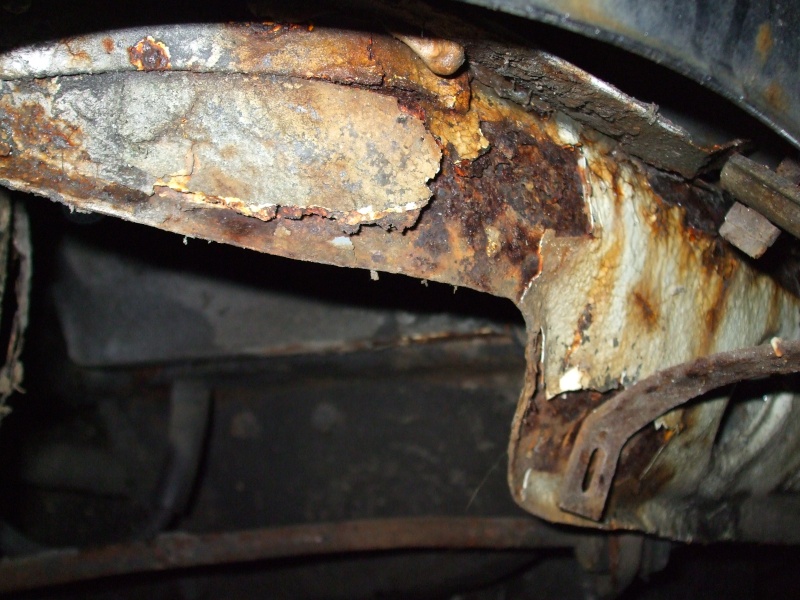 [/img][img]
 [/img][img]
 [/img]
robinkritz1- Posts : 124
Points : 5353
Join date : 2010-01-09
Re: Winnie Hornet Restoration
![]() Big_Al_Smith Sun Feb 07, 2010 5:00 am
Big_Al_Smith Sun Feb 07, 2010 5:00 am
best of british luck with it, and it's an awful lot better than old "Rusty" was...

Big_Al_Smith- Posts : 1226
Points : 6880
Join date : 2008-11-02
Age : 58
Location : Chislehurst - -

Re: Winnie Hornet Restoration
![]() CamelotR Sun Feb 07, 2010 10:32 am
CamelotR Sun Feb 07, 2010 10:32 am
For panelwork, a Mate from this forum has some intresting bits to offer. You may contact him.
CamelotR- Posts : 200
Points : 5694
Join date : 2009-04-24
Re: Winnie Hornet Restoration
![]() Guest Sun Feb 07, 2010 12:31 pm
Guest Sun Feb 07, 2010 12:31 pm
Anyway, love the pics robin, does not look too bad at all! and remember, if it gets you to the point you have enough, it looks impossible, its only sheets of metal! (well, thats what my therapist tells me!)...
Guest- Guest
Re: Winnie Hornet Restoration
![]() robinkritz1 Sun Feb 07, 2010 2:18 pm
robinkritz1 Sun Feb 07, 2010 2:18 pm
robinkritz1- Posts : 124
Points : 5353
Join date : 2010-01-09
CamelotR- Posts : 200
Points : 5694
Join date : 2009-04-24
Re: Winnie Hornet Restoration
![]() Guest Sun Feb 07, 2010 5:17 pm
Guest Sun Feb 07, 2010 5:17 pm
Guest- Guest
Re: Winnie Hornet Restoration
![]() robinkritz1 Mon Feb 08, 2010 12:56 am
robinkritz1 Mon Feb 08, 2010 12:56 am
 [/img][img]
 [/img]what lies beneath[img]
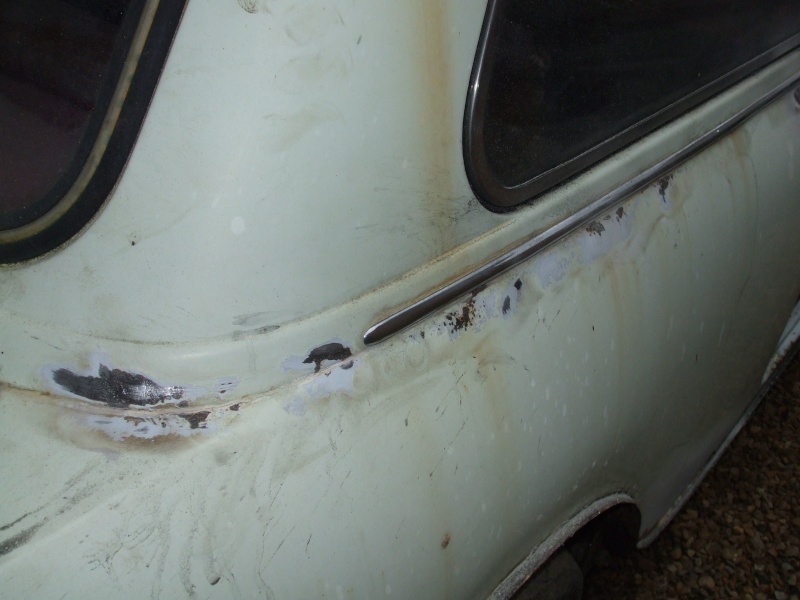 [/img]Most of the bubbling is just superficial surface rust which Im well chuffed about[img]
 [/img][img]
 [/img]this is what the rear seat looks like close up[img]
 [/img][img]
 [/img][img]
 [/img][img]
 [/img][img]
 [/img][img]
 [/img]
robinkritz1- Posts : 124
Points : 5353
Join date : 2010-01-09
Re: Winnie Hornet Restoration
![]() robinkritz1 Fri Feb 26, 2010 10:44 pm
robinkritz1 Fri Feb 26, 2010 10:44 pm
 [/img][img]
 [/img][img]
 [/img][img]
 [/img][img]
 [/img][img]
 [/img][img]
 [/img][img]
 [/img][img]
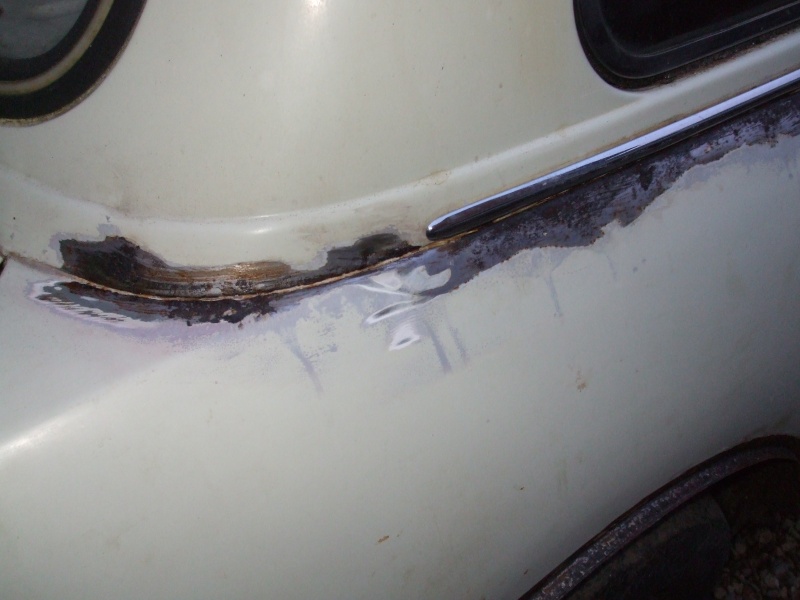 [/img][img]
 [/img]
Last edited by robinkritz1 on Sat Feb 27, 2010 1:15 am; edited 1 time in total (Reason for editing : more pics)
robinkritz1- Posts : 124
Points : 5353
Join date : 2010-01-09
Re: Winnie Hornet Restoration
![]() robinkritz1 Sun Feb 28, 2010 9:33 pm
robinkritz1 Sun Feb 28, 2010 9:33 pm
 [/img]
robinkritz1- Posts : 124
Points : 5353
Join date : 2010-01-09
Paint!
![]() DyNoRod Sun Feb 28, 2010 11:07 pm
DyNoRod Sun Feb 28, 2010 11:07 pm
Magic stuff! Buy a small can and try it on your rusty back seat pan - dries shiny and will never ever rust again!
[url=http://www.frost.co.uk/item_Detail.asp?productID=9253&frostProductName=Black POR-Starter Kit &catID=&frostCat=&frostSubCat=&subCatID=]CLICK HERE FOR POR PAINT[/url]

DyNoRod- Posts : 204
Points : 5848
Join date : 2008-11-19
Age : 50
Location : Oxfordshire
Re: Winnie Hornet Restoration
![]() robinkritz1 Sun Feb 28, 2010 11:20 pm
robinkritz1 Sun Feb 28, 2010 11:20 pm
DyNoRod wrote:If I were you, I would paint all the inside boot and floor and any others bits you cannot see with POR 15 - magic stuff (but never ever get it on your skin - it really really doesnt wash off)
Magic stuff! Buy a small can and try it on your rusty back seat pan - dries shiny and will never ever rust again!
[url=http://www.frost.co.uk/item_Detail.asp?productID=9253&frostProductName=Black POR-Starter Kit &catID=&frostCat=&frostSubCat=&subCatID=]CLICK HERE FOR POR PAINT[/url]
Thanks a lot Dyno, Frost are one of my favourite suppliers for restoration products,I have not used this stuff before but Ive heard a lot about it. Im in the process of uncovering everything first, so that I can make a clear plan of the restoration ahead, this will help me make an inventory of parts required, and I can start drawing a plan of the order in which the resto will go. I will start the preservation process very soon, as the weather being so wet and the car still outside, and surface bare, I dont want to aggravate the tin worm. Ill get the POR 15.
Last edited by robinkritz1 on Sun Feb 28, 2010 11:23 pm; edited 1 time in total (Reason for editing : spelling)
robinkritz1- Posts : 124
Points : 5353
Join date : 2010-01-09
Re: Winnie Hornet Restoration
![]() asahartz Sun Mar 21, 2010 10:27 pm
asahartz Sun Mar 21, 2010 10:27 pm

asahartz- Posts : 415
Points : 5945
Join date : 2009-03-03
Age : 62
Location : Mansfield, Notts
Re: Winnie Hornet Restoration
![]() robinkritz1 Sun Mar 21, 2010 11:58 pm
robinkritz1 Sun Mar 21, 2010 11:58 pm
Last edited by robinkritz1 on Fri Mar 26, 2010 12:14 am; edited 1 time in total
robinkritz1- Posts : 124
Points : 5353
Join date : 2010-01-09
YET MORE PEELING BACK OOOHHHLALA
![]() robinkritz1 Fri Mar 26, 2010 12:08 am
robinkritz1 Fri Mar 26, 2010 12:08 am
.[img]What will he make of the graveyard underneath there?
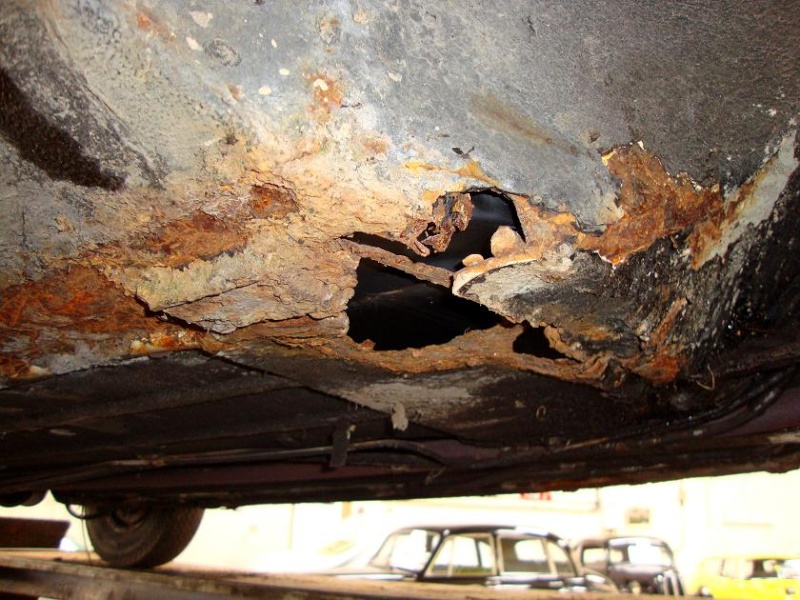 [/img][img]
 [/img][img]
 [/img][img]
 [/img][img]
 [/img][img]
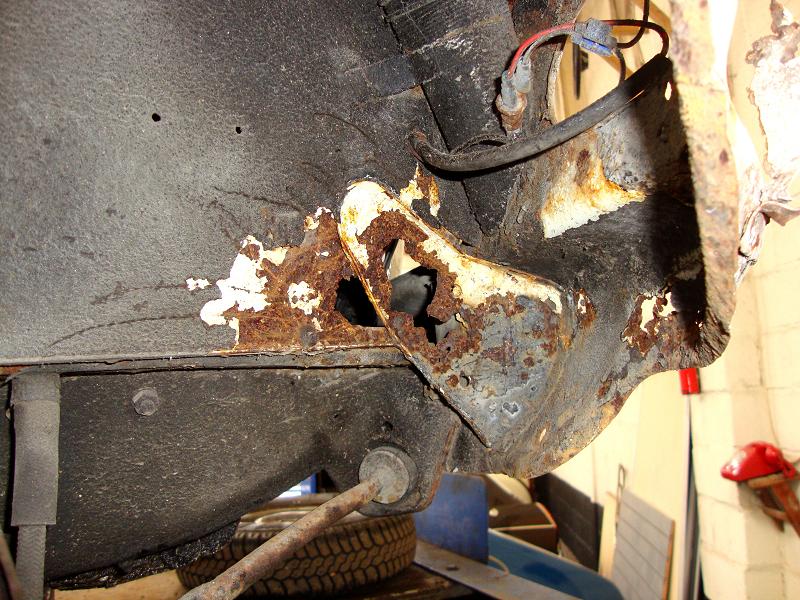 [/img][img]
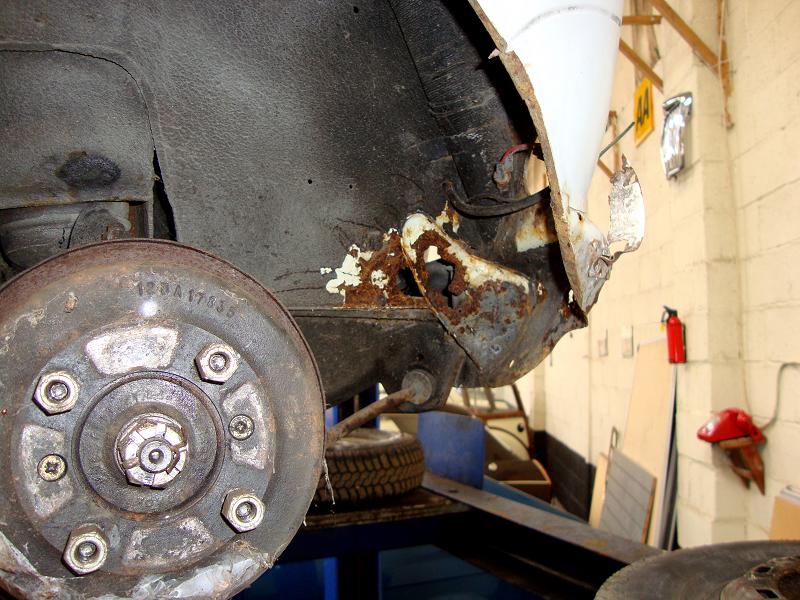 [/img][img]
 [/img][img]
 [/img]
Last edited by robinkritz1 on Wed Oct 19, 2011 11:39 pm; edited 2 times in total (Reason for editing : adding text)
robinkritz1- Posts : 124
Points : 5353
Join date : 2010-01-09
Welding
![]() DyNoRod Fri Mar 26, 2010 2:00 am
DyNoRod Fri Mar 26, 2010 2:00 am
Mine was in much the same condition and it took us about 13 months - on and off, looks like it shouldnt take you as long now you have the pros on the job!
Good luck.
DyNoRod- Posts : 204
Points : 5848
Join date : 2008-11-19
Age : 50
Location : Oxfordshire
Re: Winnie Hornet Restoration
![]() asahartz Fri Mar 26, 2010 8:45 pm
asahartz Fri Mar 26, 2010 8:45 pm
robinkritz1 wrote:Hey Asahartz, looks like Im following you everywhere on this forum, Yes I have found a donor Mini which Ill be scavenging the roof corner, but Im going to study how you went about fixing it on your link. I have also sourced a good door which I sould recieve this week.The vehicle is now with a classic car specialist and hes doing all the welding ready for MOT for me, Im going to have a hard time sorting out the front panel. I have budgeted £1000 for all the work required to get the car back on the road not including cosmetic makeup,so Im trying to be as stringent with money as possible.
I don't think just replacing the corners works very well. On the one I had, this had already been done, but had gone again. The top of the A-pillar had rotted as a result.
I cut the entire roof panel out of my donor and ground it back to just the panel. I cut the entire roof out of my Elf and ground away the remains of the spot-welds. Then i put the entire roof panel in. The tricky part is seam-welding this and subsequently dressing it back.
If you want to save some money on your front panel you could put in a standard Mini one then weld in the centre section from the old one. Or use Catmint's conversion kit. On the Elf I still have I simply replaced both ends and a section of valance in the centre; the rest remains original. Similarly a passable rear valance can be fabricated up from two pattern Mini versions at about £8 each.
asahartz- Posts : 415
Points : 5945
Join date : 2009-03-03
Age : 62
Location : Mansfield, Notts
Re: Winnie Hornet Restoration
![]() robinkritz1 Sat Mar 27, 2010 12:48 am
robinkritz1 Sat Mar 27, 2010 12:48 am
For the front, I have bought a second hand front panel which has a good middle section that I will scavenge from and a new Mini front panel all in all cost me £50, I sent the welder pictures from the catmint conversion process and says it should be alright to fix.
Underside, the outer sills that I bought were too thin so those have to go back in exchange for the wider ones, that job should have been complete this week. I've also got a new wing which will be installed when the corner scuttle panel is being fitted.
Im still waiting for my door that I bought off ebay from this guy who was selling both doors, in green all the way from Kent, that just had surface rust. Anyway I want to leave the Shillling years with all my welding done then I can slowly start prepping the body for paint, Im afraid again this will not be a back to Metal job, I'll have to save up for that, I think thats all the fun in a "work in progress" type restoration.
Last edited by robinkritz1 on Mon Jun 07, 2010 10:06 pm; edited 1 time in total
robinkritz1- Posts : 124
Points : 5353
Join date : 2010-01-09
Re: Winnie Hornet Restoration
![]() CamelotR Sat Mar 27, 2010 8:15 am
CamelotR Sat Mar 27, 2010 8:15 am
CamelotR- Posts : 200
Points : 5694
Join date : 2009-04-24
Re: Winnie Hornet Restoration
![]() Zef Sat Mar 27, 2010 12:55 pm
Zef Sat Mar 27, 2010 12:55 pm
CamelotR wrote:Try to get Your panelbeater to do the sills instead of buying one. New items (even heritage) are not the best quality, and they are very thin on material. I always do my sills (easy job maybe 2 on the 10 scale). I use minimum 1.2mms thick material (although on a historic rally mini we used sills (and crossmember) made of 2mms thick material. That realy added strenght and rigidity to the chassis!
Any chance of a guide on how to do the sills? My are just about done in and on side has been patched by the previous owner 3 times by the looks. When you do the sills do they still have the pressings in or are they smooth?
To be honest I get quite jealous of the work I see done here as I'd love the chance to do the same but as she's my daily drive I've no chance. Never mind, I'm still thinking of buying the complete floor minispares have, the one complete with inner and outer sills and cross member. The hope is that would speed a repair.

Zef- Posts : 140
Points : 5601
Join date : 2009-06-25
Age : 53
Location : Yorkshire
Re: Winnie Hornet Restoration
![]() CamelotR Sat Mar 27, 2010 2:08 pm
CamelotR Sat Mar 27, 2010 2:08 pm
The important thing is to do the "pressings" before cutting the width of the sill, unless it will dent the item. I usualy make the vent on the longer sides of a full sheet of metal, and then cut them out. This prevent the distortion.
Othervise You only need to bend it with a sheet metal bender and cut it to shape (making the jack if You would like to, I never put it on, its only a nest for the tinworm.
CamelotR- Posts : 200
Points : 5694
Join date : 2009-04-24
Re: Winnie Hornet Restoration
![]() CamelotR Sat Mar 27, 2010 2:48 pm
CamelotR Sat Mar 27, 2010 2:48 pm
CamelotR- Posts : 200
Points : 5694
Join date : 2009-04-24
Page 1 of 6 • 1, 2, 3, 4, 5, 6 ![]()
» Hornet and Elf for Restoration
» Restoration progress of mk3 hornet
» 303 JCY - 1964 Mk2 Hornet Restoration on Youtube
» Hornet restoration project in dorset
|
|
|