
Winnie Hornet Restoration
Page 2 of 6 •  1, 2, 3, 4, 5, 6
 ![]()
Re: Winnie Hornet Restoration
![]() Zef Sun Mar 28, 2010 1:12 pm
Zef Sun Mar 28, 2010 1:12 pm
Any advice on the floor, is it possible to do something similar?

Zef- Posts : 140
Points : 5594
Join date : 2009-06-25
Age : 53
Location : Yorkshire
Re: Winnie Hornet Restoration
![]() CamelotR Sun Mar 28, 2010 1:29 pm
CamelotR Sun Mar 28, 2010 1:29 pm
CamelotR- Posts : 200
Points : 5687
Join date : 2009-04-24
Roof
![]() DyNoRod Sun Mar 28, 2010 3:56 pm
DyNoRod Sun Mar 28, 2010 3:56 pm

DyNoRod- Posts : 204
Points : 5841
Join date : 2008-11-19
Age : 50
Location : Oxfordshire
Re: Winnie Hornet Restoration
![]() Big_Al_Smith Sun Mar 28, 2010 10:50 pm
Big_Al_Smith Sun Mar 28, 2010 10:50 pm
Zef wrote:That's spot on. Fantastic work. Being a visual person myself the pictures speak volumes.
Any advice on the floor, is it possible to do something similar?
going from limited personal experience, most of the repro floor repair panels seem to be a decent fit (oversize usually so you can cut them down) but mini buffs will always say to go for heritage panels, though i think i've only used one original rover panel on old rusty and that was a front wing cheap on ebay - bloody good fit though!
best of luck........

Big_Al_Smith- Posts : 1226
Points : 6873
Join date : 2008-11-02
Age : 58
Location : Chislehurst - -

Re: Winnie Hornet Restoration
![]() CamelotR Sun Mar 28, 2010 10:57 pm
CamelotR Sun Mar 28, 2010 10:57 pm
CamelotR- Posts : 200
Points : 5687
Join date : 2009-04-24
Shock and horror
![]() robinkritz1 Mon Mar 29, 2010 12:42 am
robinkritz1 Mon Mar 29, 2010 12:42 am

robinkritz1- Posts : 124
Points : 5346
Join date : 2010-01-09
Re: Winnie Hornet Restoration
![]() TONYELF Mon Mar 29, 2010 1:23 am
TONYELF Mon Mar 29, 2010 1:23 am
robinkritz1 wrote:Thanks guys some really stimulating stuff going here, my flooring has been cut out and we found about 4 layers of sheet metal from previous repairs to the inner sill and floor area yuk. I bought my floor panels from Minimail, the drivers side had to be trimmed off on the rounded section where the gear stick is located so that it blends in. I also envy the work I see being carried out on some of the cars here, I mostly envy the guys who are able to carry out the welding themselves coz they are saving loads. I will post pics of the progress, this week as its mostly just welding work being carried out im hoping hours are less on labour, last week it was the preparation and fabrication of repair sections to go in that killed me on labour costs. My welder who now also comes in handy as a parts sourcer was able to get me some good sills at half the price being offered by Minimail, I couldnt pass it up.
I was very lucky, my son-in-law is a cracking welder did the Elf for me. Although I can weld, he had more experience so I bought the Open classic for him to canabalise parts off for his own Open classic which he has now completed, and now passed it back onto me for the 1275 engine and all running gear. the body is too far gone to do anything with. ( I may play around with it, practicing a bit of welding here and there before starting on the van project. who knows I may make a trailer out if it!)
I digress, a local garage charges welding by the inch, £1 ( must owe the son in law a small fortune!)

TONYELF- Admin
- Posts : 1743
Points : 7444
Join date : 2008-11-21
Location : Chester UK
Re: Winnie Hornet Restoration
![]() robinkritz1 Mon Mar 29, 2010 7:51 pm
robinkritz1 Mon Mar 29, 2010 7:51 pm
robinkritz1- Posts : 124
Points : 5346
Join date : 2010-01-09
Re: Winnie Hornet Restoration
![]() TONYELF Mon Mar 29, 2010 8:23 pm
TONYELF Mon Mar 29, 2010 8:23 pm
1) Radial tyres- Camac. give a lovely smooth and comfortable ride but rubbish at speed on corners but ok!
2) Door mirrors- as against the overtakers on the A pillar. (too much vibration) Elf and Safety comes 1st !
3) Clutch Master cylinder. (already on car) But prefer that- can see the fluid level straight away- may change the brake master for one later- together with stainless flexible hoses? maybe discs but not sure yet.
4) Swapped the wiper switch position for the light switch- use that more than the lights these days!
5) removed dash light switch - replaced with spring toggle switch for electric screen wash.(orig hand pump still on show!
I think thats about it!
TONYELF- Admin
- Posts : 1743
Points : 7444
Join date : 2008-11-21
Location : Chester UK
Re: Winnie Hornet Restoration
![]() Red Riley Mon Mar 29, 2010 8:35 pm
Red Riley Mon Mar 29, 2010 8:35 pm
I mostly settle for original-ish looking. Most folks on this side of the pond don't know the diff anyway.

Red Riley- Admin
- Posts : 1239
Points : 6950
Join date : 2008-10-27
Age : 64
Location : Johns Island, SC, USA
Re: Winnie Hornet Restoration
![]() Big_Al_Smith Mon Mar 29, 2010 10:57 pm
Big_Al_Smith Mon Mar 29, 2010 10:57 pm
Red Riley wrote:Original parts? What are those? To paraphrase the famous movie line, "We don't need no steenking original parts!"
I mostly settle for original-ish looking. Most folks on this side of the pond don't know the diff anyway.
original or not, your little car is still one of the coolest elfs on the planet......if not the coolest
Big_Al_Smith- Posts : 1226
Points : 6873
Join date : 2008-11-02
Age : 58
Location : Chislehurst - -
CamelotR- Posts : 200
Points : 5687
Join date : 2009-04-24
Re: Winnie Hornet Restoration
![]() Big_Al_Smith Mon Mar 29, 2010 11:01 pm
Big_Al_Smith Mon Mar 29, 2010 11:01 pm
hazard warning lights
1100 unleaded head on original 998 engine
1.5 carb on water heated inlet manifold
cooper 2" single box exhaust
later mini front reclining seats
cooper s disc brakes
electric windscreen washers
front wings, a-posts and nearside door
but.....it is still on it's original, 42 year old sills! yep, it's never had new sills
Big_Al_Smith- Posts : 1226
Points : 6873
Join date : 2008-11-02
Age : 58
Location : Chislehurst - -
Re: Winnie Hornet Restoration
![]() robinkritz1 Mon Mar 29, 2010 11:40 pm
robinkritz1 Mon Mar 29, 2010 11:40 pm
 [/img]
Last edited by robinkritz1 on Sat Apr 03, 2010 3:51 pm; edited 1 time in total
robinkritz1- Posts : 124
Points : 5346
Join date : 2010-01-09
Re: Winnie Hornet Restoration
![]() robinkritz1 Mon Mar 29, 2010 11:46 pm
robinkritz1 Mon Mar 29, 2010 11:46 pm
robinkritz1- Posts : 124
Points : 5346
Join date : 2010-01-09
Re: Winnie Hornet Restoration
![]() Big_Al_Smith Tue Mar 30, 2010 10:30 pm
Big_Al_Smith Tue Mar 30, 2010 10:30 pm
http://cgi.ebay.co.uk/KIT-CAR-CLASSIC-CAR-UNIVERSAL-HAZARD-WARNING-KIT_W0QQitemZ160415630698QQcmdZViewItemQQptZUK_CarsParts_Vehicles_CarParts_SM?hash=item255984456a
this link above is the same kit as i bought and fitted though mine was only £8 a few years ago! it wires into the loom under the steering column
Big_Al_Smith- Posts : 1226
Points : 6873
Join date : 2008-11-02
Age : 58
Location : Chislehurst - -
More progress
![]() robinkritz1 Sat Apr 03, 2010 4:21 pm
robinkritz1 Sat Apr 03, 2010 4:21 pm
 [/img]Front section of drivers side rear inner wheel arch[img]
 [/img]front inner arch repair[img]
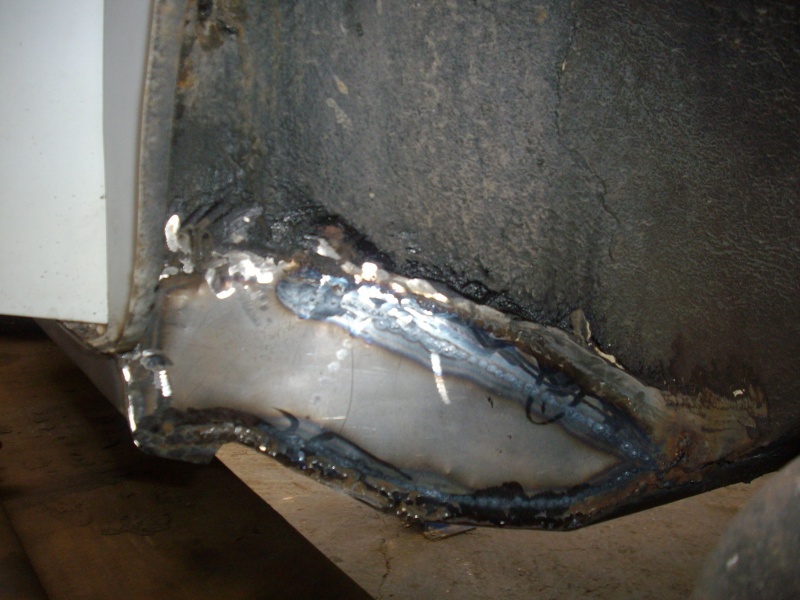 [/img][img]
 [/img][img]
 [/img][img]
 [/img][img]
 [/img]
robinkritz1- Posts : 124
Points : 5346
Join date : 2010-01-09
Re: Winnie Hornet Restoration
![]() asahartz Sun Apr 04, 2010 1:00 pm
asahartz Sun Apr 04, 2010 1:00 pm
One question on the sills, looks like the bottom edge is a full seam - have any drainage points been left?
The original sills had vents in to allow water to drain out. That's where the "humps" are in the cover sills. When cover sills are fitted it's even more important to leave a drainage vent at each end, as eventually water will find it way in, and apart from the rust potential, the only way out is into the car through the cross-member, as my City E is currently demonstrating!
When I fit sills I ensure that they are fitted over the lifting slings which then double as a convenient vent.

asahartz- Posts : 415
Points : 5938
Join date : 2009-03-03
Age : 62
Location : Mansfield, Notts
Re: Winnie Hornet Restoration
![]() robinkritz1 Mon Apr 05, 2010 11:14 pm
robinkritz1 Mon Apr 05, 2010 11:14 pm
 [/img][img]
 [/img][img]
 [/img][img]
 [/img][img]
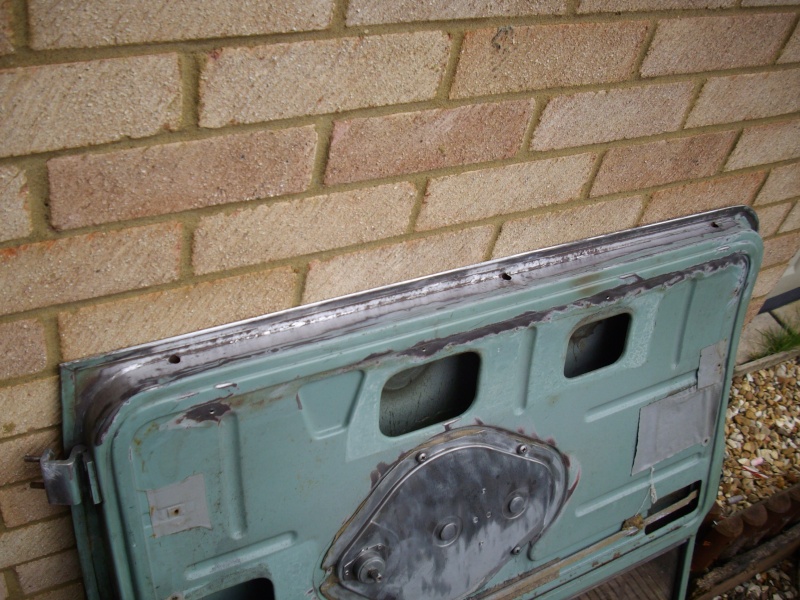 [/img]
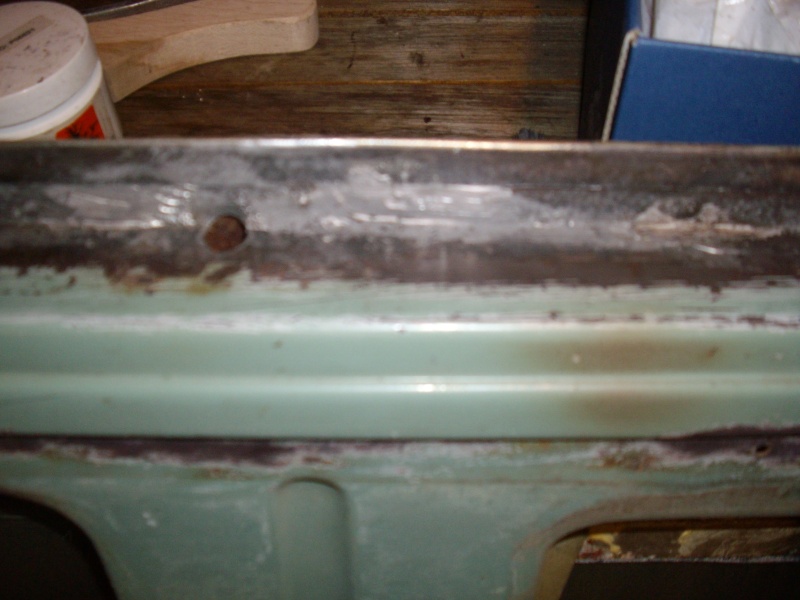
Now with the door holes so small, how do I get in there to srub out the surface rust on lower part of the inner door skin? anyone with ideas?
robinkritz1- Posts : 124
Points : 5346
Join date : 2010-01-09
Doors
![]() DyNoRod Tue Apr 06, 2010 12:39 am
DyNoRod Tue Apr 06, 2010 12:39 am
DyNoRod- Posts : 204
Points : 5841
Join date : 2008-11-19
Age : 50
Location : Oxfordshire
wow
![]() brooks Sun Apr 18, 2010 11:48 am
brooks Sun Apr 18, 2010 11:48 am

brooks- Posts : 33
Points : 5604
Join date : 2009-01-10
Age : 31
Location : devon
Re: Winnie Hornet Restoration
![]() robinkritz1 Sun Apr 18, 2010 12:51 pm
robinkritz1 Sun Apr 18, 2010 12:51 pm
 [/img][img]
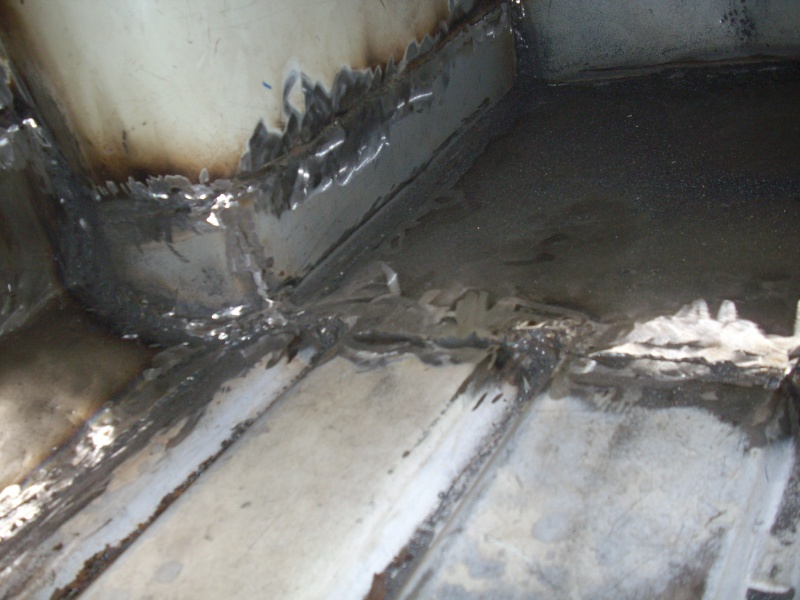 [/img][img]
 [/img]
robinkritz1- Posts : 124
Points : 5346
Join date : 2010-01-09
Re: Winnie Hornet Restoration
![]() TONYELF Sun Apr 18, 2010 5:45 pm
TONYELF Sun Apr 18, 2010 5:45 pm
TONYELF- Admin
- Posts : 1743
Points : 7444
Join date : 2008-11-21
Location : Chester UK
Re: Winnie Hornet Restoration
![]() robinkritz1 Sun Apr 18, 2010 8:22 pm
robinkritz1 Sun Apr 18, 2010 8:22 pm
robinkritz1- Posts : 124
Points : 5346
Join date : 2010-01-09
:)
![]() brooks Wed Apr 21, 2010 5:47 pm
brooks Wed Apr 21, 2010 5:47 pm
brooks- Posts : 33
Points : 5604
Join date : 2009-01-10
Age : 31
Location : devon
Page 2 of 6 • 1, 2, 3, 4, 5, 6 ![]()
» Hornet and Elf for Restoration
» Restoration progress of mk3 hornet
» 303 JCY - 1964 Mk2 Hornet Restoration on Youtube
» Hornet restoration project in dorset
|
|
|